After completing the family, living and dining rooms, the master bedroom and the powder room, we took a break and didn't work at all on anything in the house. Then late last year my in-laws decided to visit us and that was the prompt to start working on getting one guest room ready (the other is still a store room and I don't intend to furnish it any soon!).
By this time we had already become quite experienced with major construction projects and smaller patching ones, so we decided to go the DIY way for everything in the room, including furniture. I don't have a before picture for this room but it was again an ugly shade of brown that we repainted to a very pale shade of blue, almost white, and going with the theme in rest of the house- painted the feature wall gray.
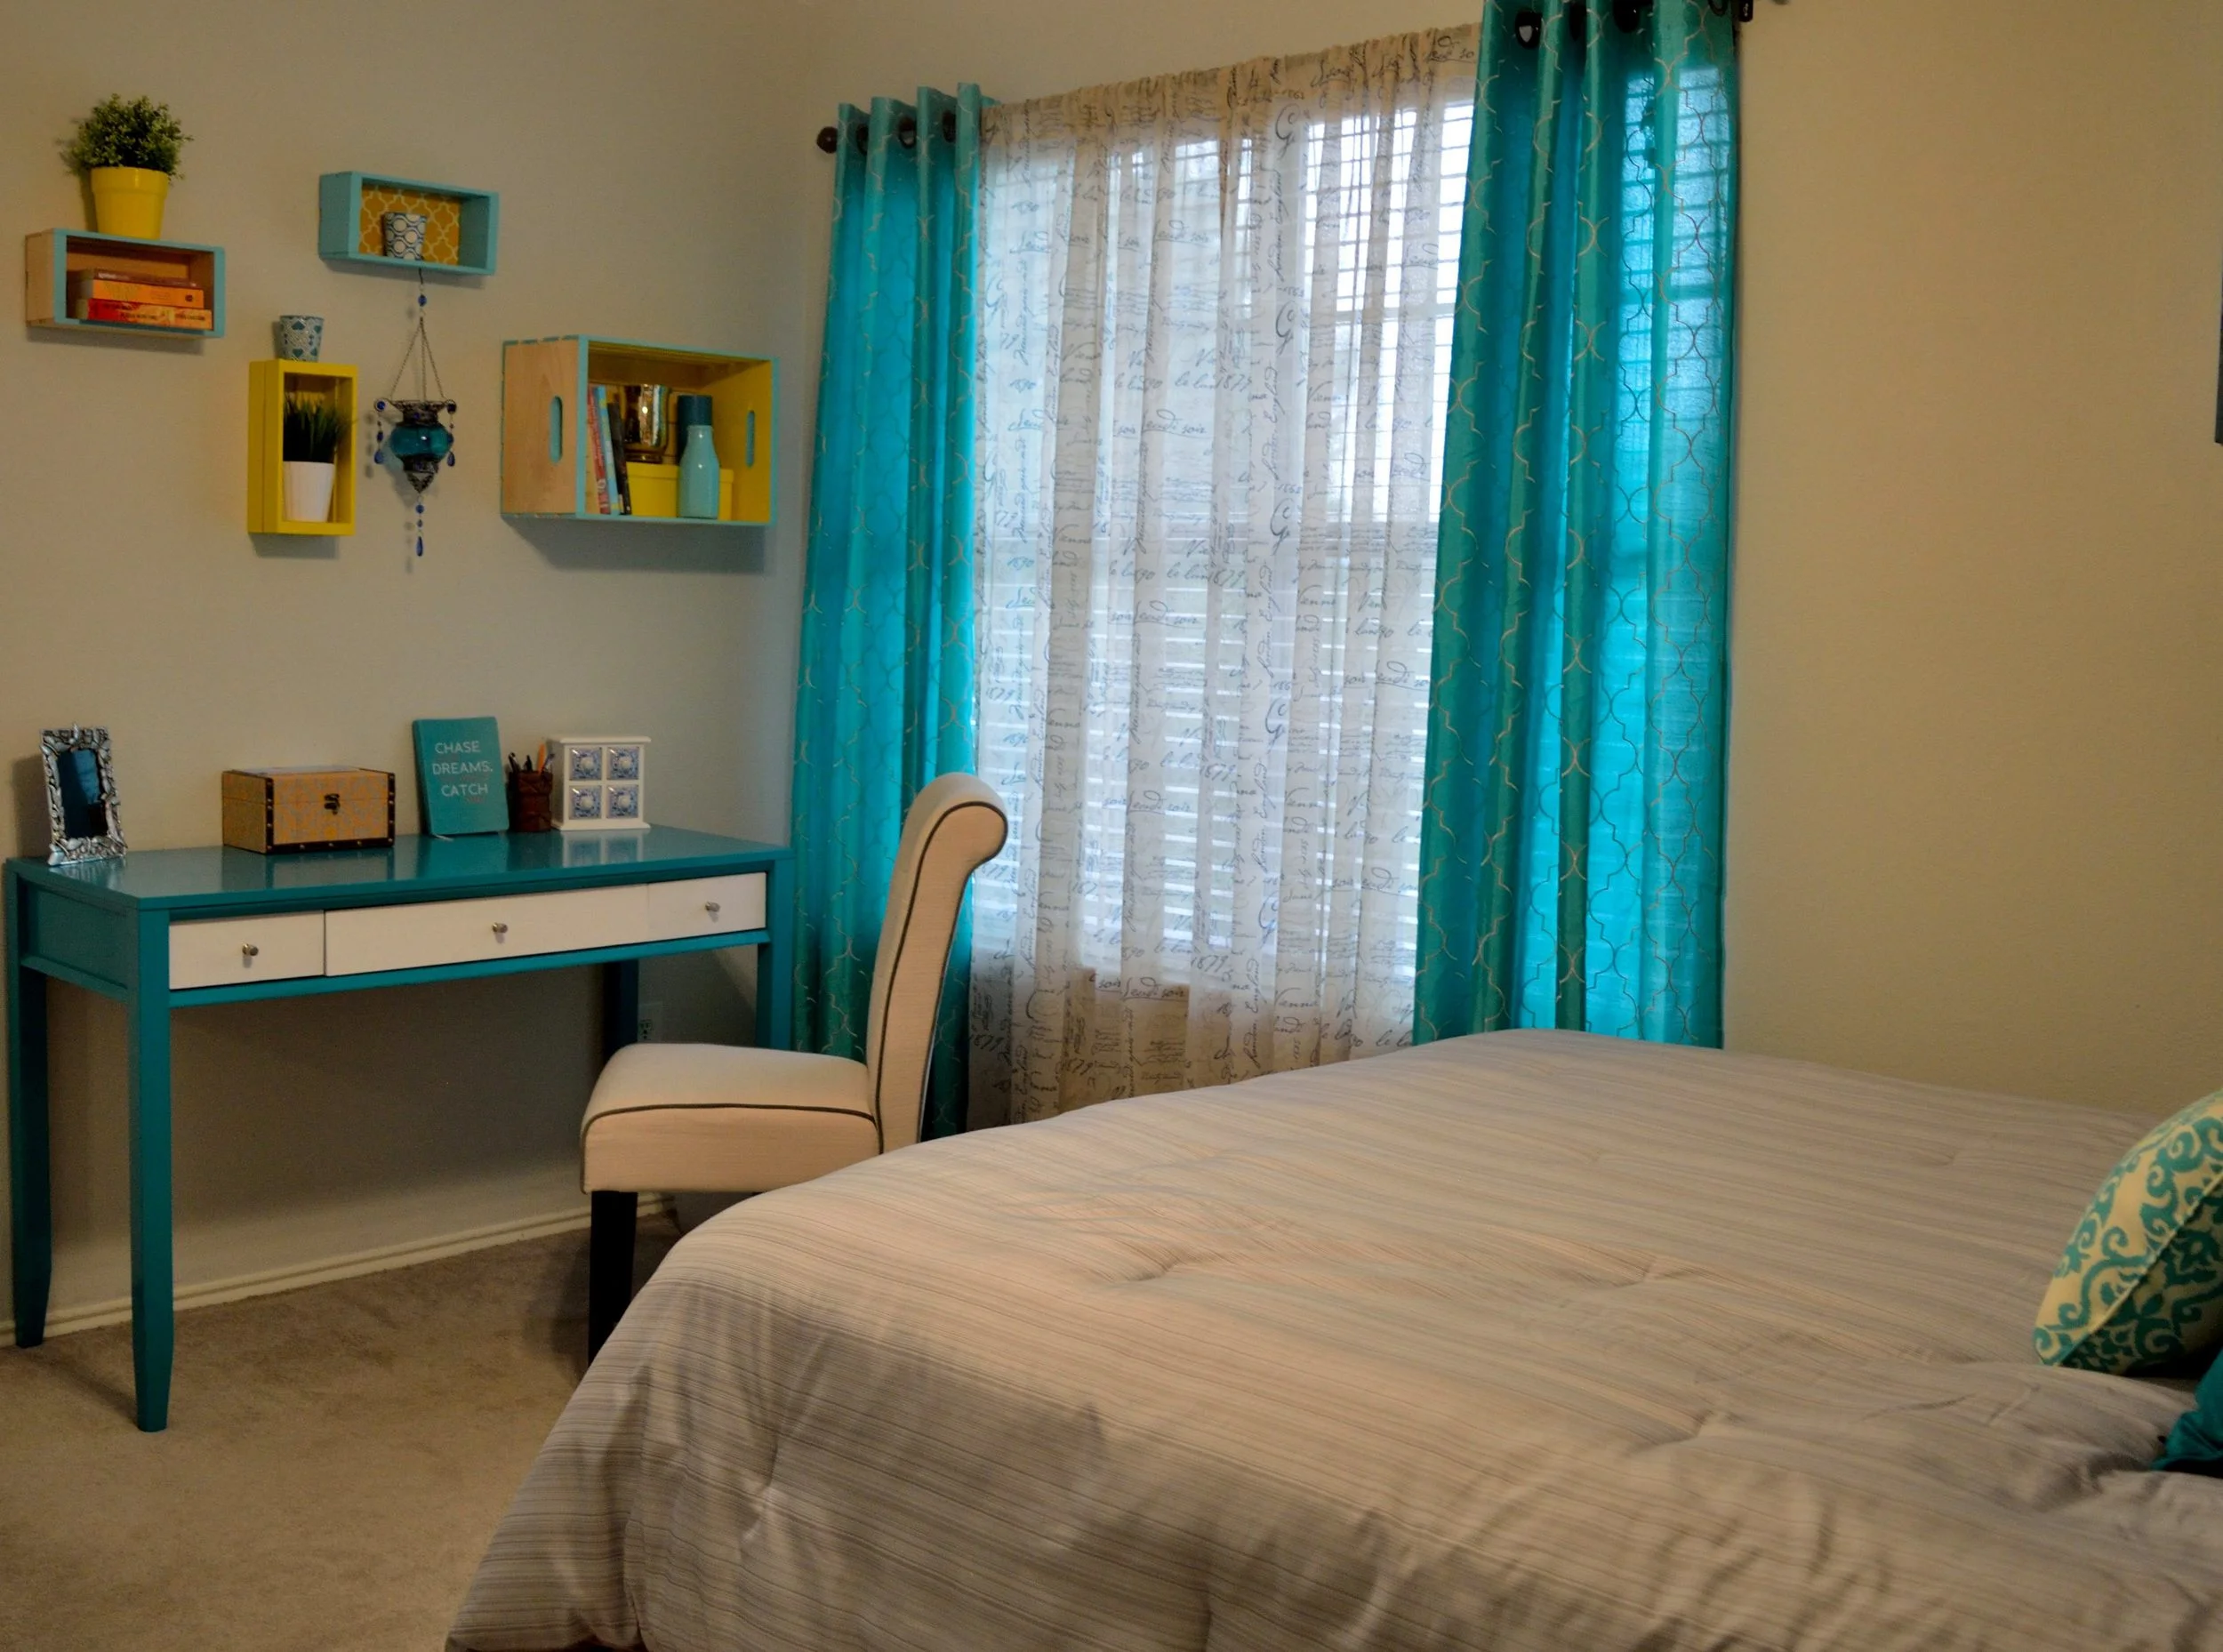
For the furniture, we bought a old dresser and study desk from craigslist and sanded and painted it to a nice shade of turquoise and white.

The Dresser was old, brown and weathered that we primed and painted white and the drawers a nice turquoise blue. We refinished the hardware and painted it white too.

The finished product that I used under a mirror, which was already attached to the wall and wouldn't come out.
I embellished the shapeless mirror over the dresser that had paint stains on the edges with some glass tiles that hid those edges and gave the mirror some nice sheen. The tiles also go with the theme of the room. I used the same technique to embellish the plain old mirror in the guest bathroom with square mosaic tiles that I will discuss in my upcoming posts.
For the computer desk, I used the opposite colors for the drawers and the frame. I also bought some wooden crates at the hobby store and painted them with the colors in the room.

The refurbished study desk and the wall decoration using wooden crates.
I used props such as books and plants to to create visual interest and used the yellow fabric that we used for the headboard as backdrop of one those crates. Talking about the headboard, that is a huge project in itself involving plywood, foam, fabric, hot glue, nail gun and a lot of patience!

Those are the squares that make up the headboard, each with a base of individually cut insulation foam board, normal foam pad and fabric hot glued and nailed together on the ply wood.

Here is the finished product, which is not perfect but not bad for a first attempt.
The wall next to the bed looked a little plain and my in-laws were going to arrive the very next day. I had a small canvas at home that I used to paint the calm Buddha on. In the future I would like to create something a little bigger and elaborate for this wall, but it works for the time being.